Create Projects
Projects always belong to some organization. Personal accounts cannot have projects.
To create a project, you need to be an organization owner.
1. Create a new project
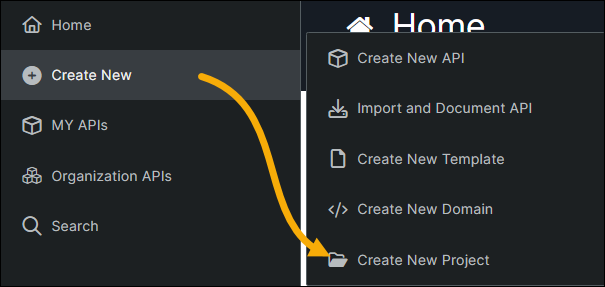
Click and select Create New Project.

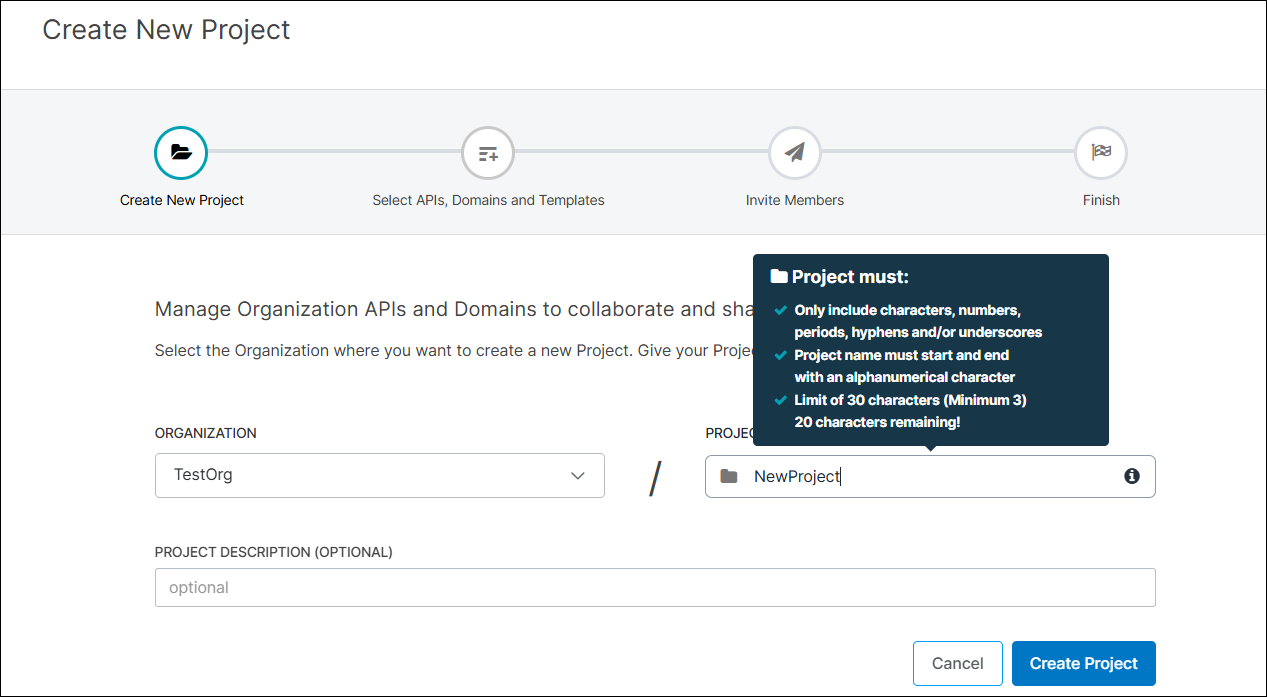
On the next screen:
If you have multiple organizations, select the one where you want to create the project.
Specify the project name. It can be 3 to 30 characters long and must be unique within the organization.
Important
Projects cannot be renamed, so choose the name carefully.
(Optional.) Specify the project description (up to 40 characters).

Click Create Project.
The created project appears under the organization name in the sidebar.
2. Select APIs and domains
After you created the project, you can add APIs and domains to it. You can do this now, or any time later.
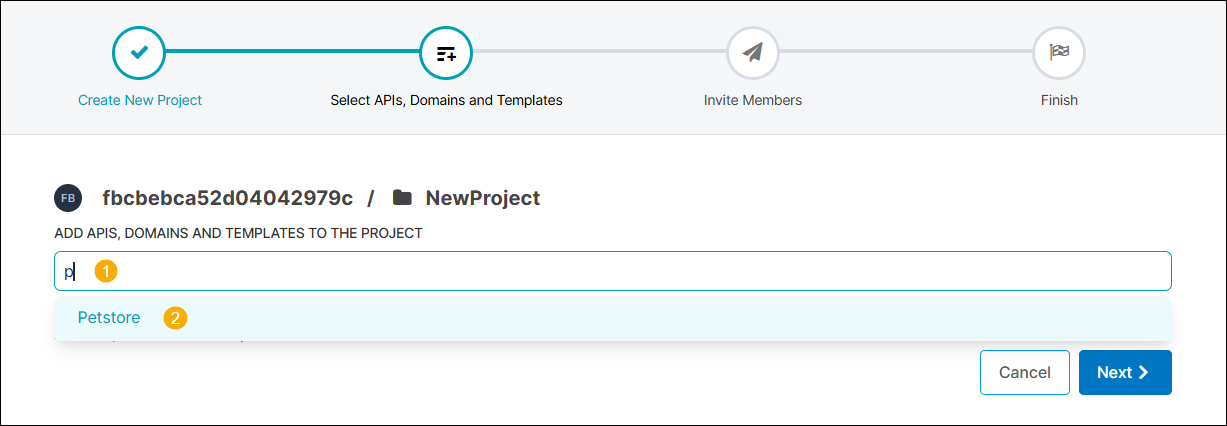
To add APIs and domains, click within the search box and either press an arrow down or start entering an API or domain name to display a drop-down list. API Hub for Design will filter the list on the fly. Select the API or domain you want to add to the project:

You can add as many APIs and domains, as needed.
Note
The list contains only those APIs, which your organization owns (including private APIs). If you do not see an API or domain on the list, then, most likely, your organization does not own it. In this case, you can skip this step, and add the API or domain to your project later, after you transfer the API (or domain) ownership to the organization.
Important
API Hub for Design does not automatically save the changes you made to the list of APIs and domains. To save the changes, you should go to the next step and click Save there.
3. Invite members
In this step, you can add users to your project. You can do this now or any time later.
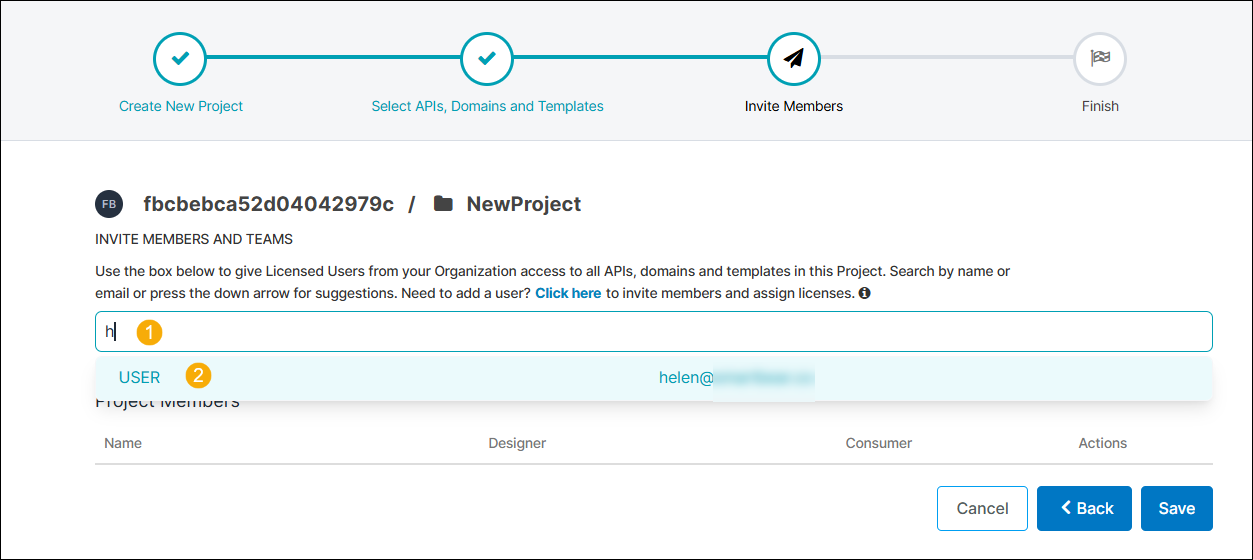
To invite users now, click within the search box and either press an arrow down or start entering the username to display a drop-down list. API Hub for Design will filter the list on the fly. Select the users you want to add to the project:

You can invite as many users as needed.
Note
The list displays only the members of your organization. If you do not see the needed user on the list, you have to add that user to your organization first.
4. Complete project configuration
After you added APIs and domains to the project and invited users, click Save on the Invite Members page. This will save the changes you made to the API and user lists.
Configure projects
For information on configuring existing projects, see other pages of the Projects section.