Apigee Edge Integration
Apigee Edge is an API management platform that allows developers to secure, manage, scale and analyze their APIs and API traffic. The API Hub for Design integration with Edge lets you export your API definition as an API proxy in Edge. The created proxy will route requests to your existing backend API while adding extra features like security, rate limiting, quotas, analytics, and more.
Supported versions
Apigee Edge Cloud
Apigee Edge for Private Cloud
If you use Edge for Private Cloud, you must have already configured an organization and environment.
Supported OpenAPI versions
This integration supports OpenAPI 2.0 and OpenAPI 3.0.
Considerations
The integration requires an Apigee user account with a login and password. Accounts using two-factor auth or SAML are not supported.
If you use API Hub for Design and Edge for Private Cloud, your Edge server must be accessible from the public Internet and allow connections from our IP addresses.
Your API definition must specify the
basePath. It will be used as your proxy base path in Edge. For example, if your API hasbasePath: /api/v2, the proxy’s public URL will behttp(s)://{orgname}-{environment}.apigee.net/api/v2. An API with thebasePathof/will get a proxy at the root of your Edge environment. If you are going to add multiple APIs to Edge, make sure they have differentbasePathvalues.We recommend that you specify the
operationIdfor your API operations – they will be used as endpoint names in Edge.The proxy in Edge will be given a new revision every time you save the API in API Hub for Design. New revisions are not deployed automatically. To activate the changes, you will have to go back to the Edge console and deploy the new revision manually. The procedure is explained below.
The integration is one-way, meaning your API definitions go from API Hub for Design to Apigee Edge, but not vice versa. You should edit your API definitions in API Hub for Design only.
The integration is tied to a specific version of an API. If your API has multiple versions, you can configure the integrations separately for different versions, provided that these versions have different
basePathvalues.
How the integration works
The integration is triggered every time you save your API in API Hub for Design. If a proxy does not exist in Edge, it will be created, and then a new revision of the proxy will be created upon each save. The proxy name is saved in the x-apigee-id key at the root level of your API definition.
The proxy serves as a management layer in front of your existing backend API and allows you to attach various policies to manage the traffic, add authentication, transform the payload and so on. These policies are configured in the Edge console. Note that new revisions of the proxy will not inherit the policies of previous revisions, so you will have to re-configure the policies manually for new revisions of the proxy.
After configuring the proxy, you can deploy it to the production or test environment in Edge. The integration does not deploy the proxy automatically. This must be done manually and repeated whenever you update your API definition in API Hub for Design.
A deployed proxy has a public-facing URL in the format http(s)://{orgname}-{environment}.apigee.net/{basePath} that the API clients can use to access the API. You can then specify the proxy as a host for your API in API Hub for Design in order to test the proxy using the “try it out” button.
The procedure is explained in more detail below.
Step 1. Configure the integration
Open your API page in API Hub for Design.
If the API has several versions, select the version you want to push to Apigee Edge.

If this version is published, unpublish it. Only unpublished APIs can be integrated with Apigee Edge.
Click the API name, switch to the Integrations tab, and click Add New Integrations.
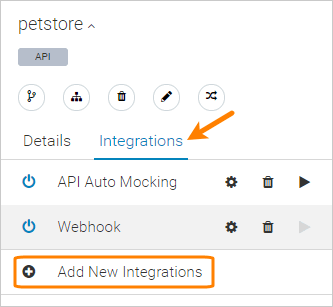
Select Apigee Edge from the list of integrations.
Enter the integration parameters (all are required):
Name – A display name for this integration, for example, Apigee.
Apigee Edge Server – The URL used to access the Edge management API. If you use Apigee Edge Cloud, leave the default value https://api.enterprise.apigee.com/v1, otherwise, replace it with the corresponding URL for your private Edge instance.
Apigee email and Apigee account password – The email and password you use to log in to Apigee Edge.
Click Update to verify the credentials and display other settings.
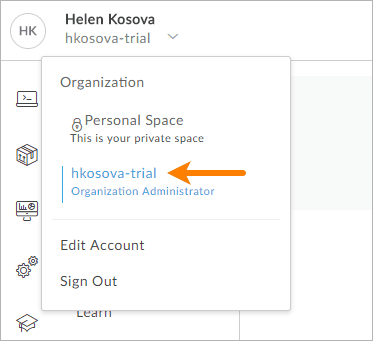
Organization – The organization within your Edge account where the API proxy will be created. You can see your organization names in your username menu in Apigee Edge.
Click Next to verify the organization permissions and display other settings.
API Name – A unique name for the created API proxy. Valid characters are letters, numbers, dash (-), and underscore (_). You can also specify the name of an existing API proxy - in this case, the integration will create a new revision of this proxy.
The proxy name will also be saved in the
x-apigee-idkey in your API definition.Target URL – The endpoint to which Apigee Edge will route the requests. For example, http://api.example.com/reports/v2 or https://myapi.com. If your API definition specifies the
host,basePathandscheme, this isscheme://host/basePath.Enabled – Enables or disables the integration.
Click Create and Execute, then Done.
API Hub for Design will create or update the specified API proxy, and from now on will create a new revision of the proxy every time you save your API definition.
Step 2. Deploy API proxy to production
The created API proxy is not deployed automatically. You need to deploy the proxy manually, and redeploy it whenever you update the API definition in API Hub for Design.
To deploy the proxy:
In Apigee Edge, click your username and select the organization from the menu.
Click API Proxies. You will see the list of existing API proxies for your organization.
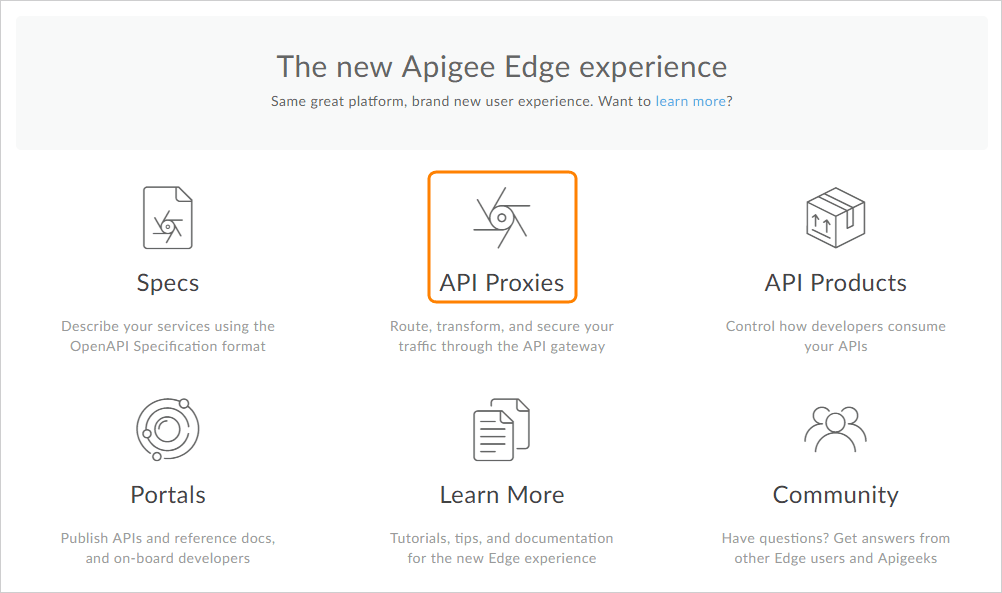
Click the image to enlarge it.
Click the proxy created for your API. This will display the latest revision of the proxy.

Click the image to enlarge it.
Expand the Proxy Endpoints to verify that the operation list matches your API definition. The endpoint names in the Endpoint Flow Name column are taken from the
operationIdspecified in your API definition.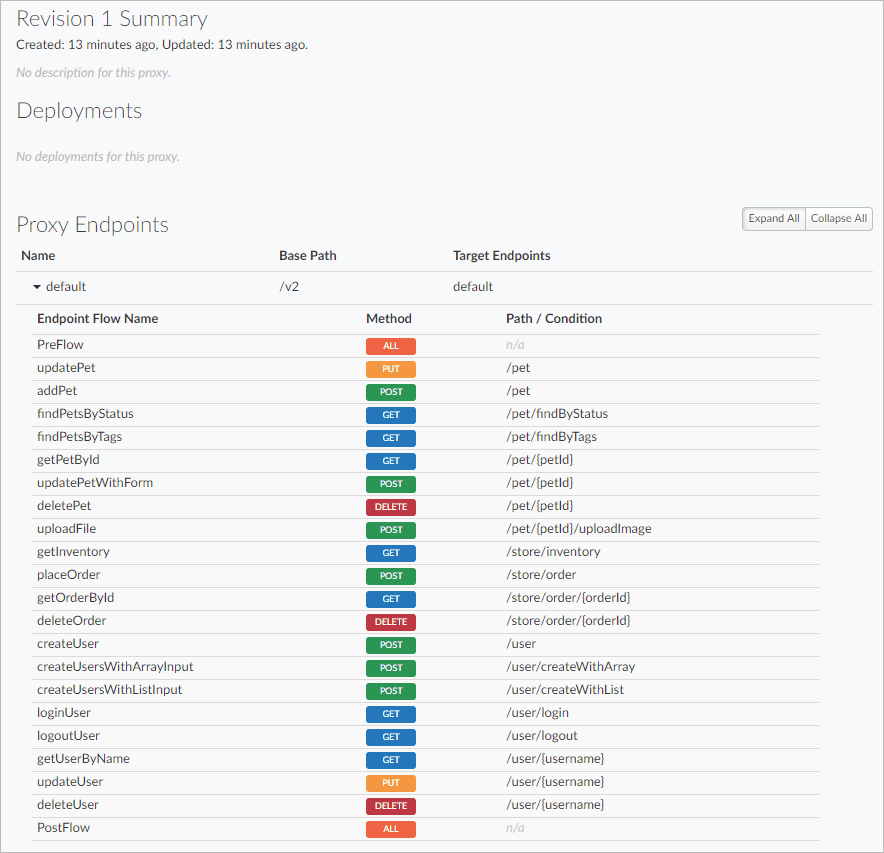
Click the image to enlarge it.
Click the Deployment button at the center and select the prod environment.
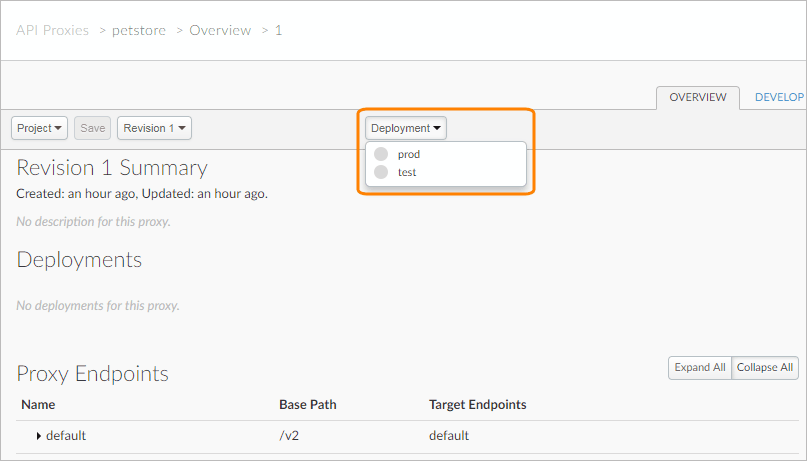
Click the image to enlarge it.
Your API proxy is now deployed to production.
At this point, the proxy is a simple pass-through proxy that forwards all requests to your backend API. If you wish, you can attach policies to the proxy that would implement rate limits and authentication, transform requests or responses, or augment your APIs in other ways. Refer to the Apigee Edge documentation to learn more about using policies.
Note
New revisions of the proxy do not inherit the policies of previous revisions, so you will need to reconfigure the policies when a new revision is created.
Step 3. Update host for interactive API docs
Now that your API proxy is deployed, you can change the host and schemes in your API definition to point to the proxy. This way, the requests made from the interactive API docs in API Hub for Design will be directed to this proxy, and the proxy will forward them to your original backend API.
You can find the base URL of the proxy in its Edge:
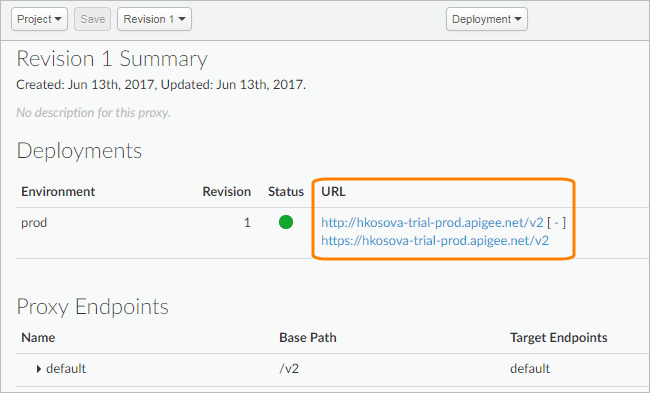 |
Click the image to enlarge it.
Specify the corresponding values in your spec in API Hub for Design:
host: hkosova-trial-prod.apigee.net
basePath: /v2
schemes:
  - https
  - http
Now, you can test the proxy using the “try it out” button in API Hub for Design.
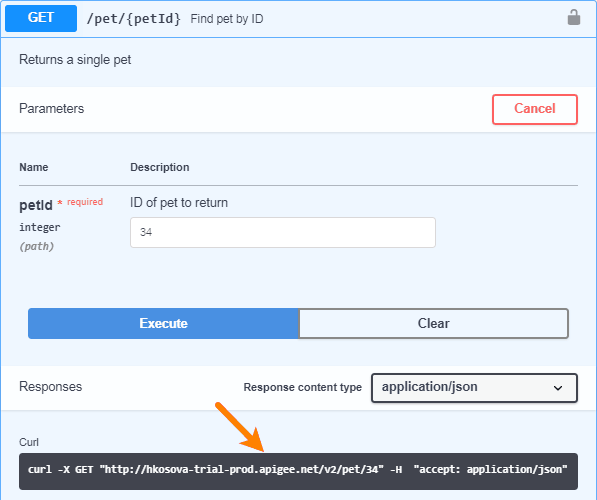
Note that changing the host in the spec will not affect the target host configured for the proxy in Apigee Edge, because the target host is taken from the integration settings and not from the spec.
Disable the integration
If you no longer wish to push your API definition to Apigee Edge, you can either delete the integration or disable it. Your API proxy will remain in Apigee Edge, but API Hub for Design will not update it anymore.