Inviting Members
You can invite members to your organization and assign them subscriptions and optionally, administrator privileges. Members without valid subscriptions cannot interact with the solutions to which their organization subscribes. In SmartBear Admin, inviting users involves assigning organization-level permissions to the invitees.
Note
To invite users to an organization, you must have administrator privileges.
On the SmartBear Admin home page, click the Members tab to see the list of organization members.
To add a member to the organization, click Invite Members.
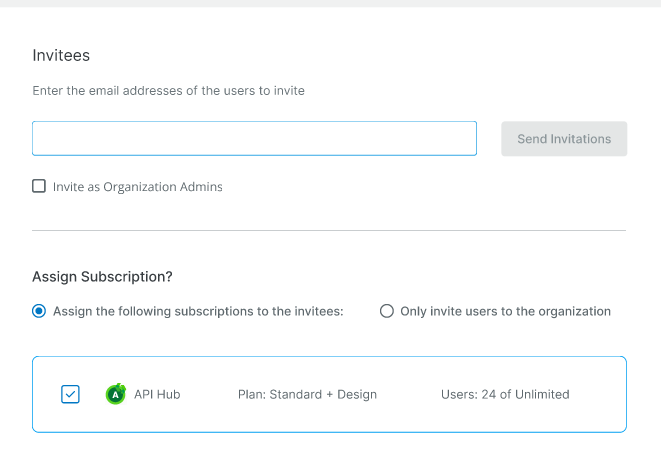
In the Invitees box, enter the user email address you want to invite. To add multiple email addresses, add a comma after each email address if inviting more than one user.
(Optional) Select the Invite as Organization Admins check box to invite users and assign them administrator privileges in your organization simultaneously.
Under Assign Subscriptions, the list of subscriptions for the particular solution appears.
Select one of the following subscription types to assign subscriptions to the users: Assign the following permits to the invitees or Only Invite users to the organization.
Select Assign the following subscriptions to the invitees' option to invite members to an existing subscription plan.
To assign a subscription, from the list of solutions and plans, select the check box next to the required solution you want to assign the users.
You are navigated to the solution and permissions page, where you can manage the required access and permissions.
Click Only Invite users to the organization option to invite the user only to an organization. Users with no subscriptions assigned cannot interact with the organization they have subscribed to.
Click . This will send an email that requires a user to accept the invitation.
Important
Before a user accepts the invite, you can remove the invitation. To do so, navigate to the user's details page and click . For more information, see Managing Members.
A summary page confirms that more individuals can now be invited to access certain solution. This page includes the list of solutions and the permissions. You are also provided with an option to "Set Granular Permissions." Clicking the link navigates you to the respective solution permission page to access and manage permissions for the solution within an organization.